Deploying Winfrasoft Forefront TMG Virtual Appliances
by


Scott Glew
I am frequently asked by users of Forefront TMG, how to continue using the product now that Microsoft is no longer selling licences as of January 2013. The most common decision is to look for a third part proxy or secure web gateway solution.
However, many third party solutions do not cover all the functions of Forefront TMG, and often come with a much higher price tag. As Forefront TMG will be supported through to 2015 (and through to 2020 via extended support), swapping out your existing TMG infrastructure may not be a high priority concern.
As we reported in March, the OEM loophole is one way you can still purchase new or additional Forefront TMG licenses, and Winfrasoft is the only vendor making Forefront TMG available as a virtual appliance.
Deploying the Winfrasoft TMG virtual appliance can save you deployment time and costs by utilizing your existing VMWare or Hyper-V infrastructure.
Having now deployed several Winfrasoft TMG Virtual Appliances, I thought I would document the process to show you how quick and easy it is!
Requirements for Winfrasoft Forefront TMG Virtual Appliance
Winfrasoft's TMG Virtual Appliance is a customized Windows Server installation with Forefront TMG (either Standard or Enterprise) pre-installed.
Winfrasoft offer three deployment options:
- Physical appliance
- Virtual Appliance for Hyper-V
- Virtual Appliance for VMWare (any version)
The virtual appliances have the following minimum requirements:
- CPU – 1 (Multi CPU / Core is ideal)
- RAM – 4 GB (will function with 2 GB but it’s not recommended)
- Hard disk – 40 GB
- Network Interfaces – 2 (for TMG Firewall and proxy) or 1 (for TMG proxy only)
It’s also recommended to use the Forefront TMG Capacity Planning tool Worksheet to plan your deployment.
Winfrasoft virtual appliances are supported on the following platforms supporting 64bit guest architecture:
Microsoft:
- Microsoft Windows Server 2008 x64 with Hyper-V
- Microsoft Windows Server 2008 R2 with Hyper-V
- Microsoft Hyper-V Server (including R2)
VMware:
- VMware Workstation 6.x and 7.x
- VMware vSphere
- VMware vSphere Hypervisor (ESXi) 4.x
- VMware Server
Note: There is currently no support for Citrix XenServer
Downloading the Winfrasoft Forefront TMG Virtual Appliance
To evaluate the Winfrasoft Forefront TMG Virtual Appliance, click the link below which will guide you to the download page:
https://www.winfrasoft.com/products/appliances/download-appliance/
The download page looks like this:

When you extract the downloaded files you will have the ISO image and some PDF files with step by step instructions on how to deploy the Winfrasoft TMG Appliance:

Deploying Winfrasoft Forefront TMG Virtual Appliances
My test lab was built using Hyper-V on Windows Server 2008 R2 Datacenter with the specs below for my Virtual Machine:
- RAM – 6 Gb’s
- Processor – 2 virtual processors
- Disk – 1 virtual disk – 50 GB’s
- Network – A virtual switch pointed to my Internal network and another to my external network (Internet Access) – Edge Architecture
- CD/DVD – Pointing to the ISO image downloaded from Winfrasoft website and copied to some place inside the server so as I could start the deployment.
The same specs can be used for VMWare deployments.
Installation
Select the ISO image you downloaded in the virtual machine's DVD drive, and turn on the virtual machine:
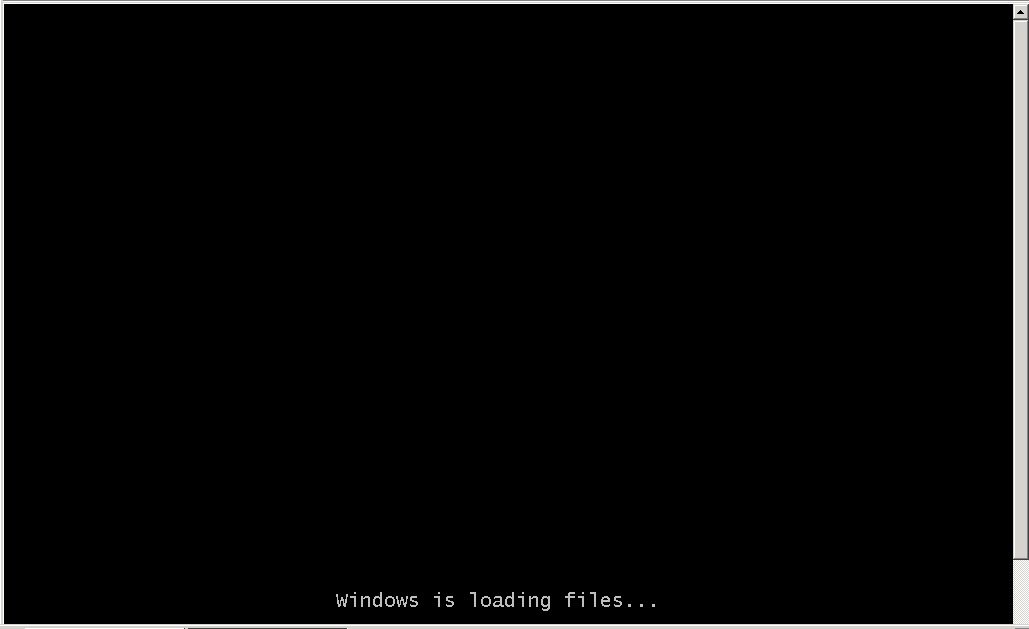
After Windows loads all files you will see the image below. Click the Return to Factory Settings:

Setup duration will depend on the physical host and VM settings you are working with:
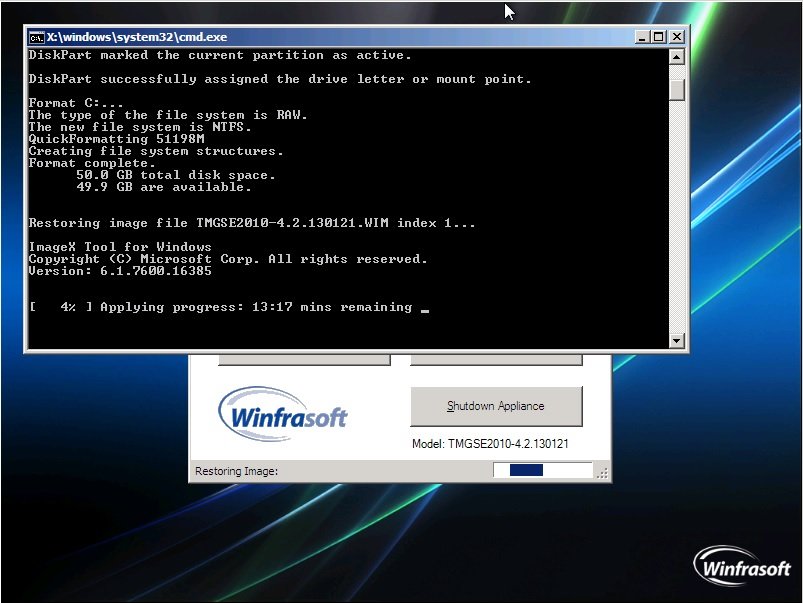
Once the restore is complete, click OK to restart the appliance:

Restarting the appliance will start services:

The appliance will prepare the computer for first use:

Once the computer is ready, it will prepare your desktop:

Once the desktop ready, the Appliance Configuration Wizard will be presented. Click Next:

Enter the IP address settings for your internal network and click Next:

Enter the IP settings for your external network card and click Next:

Important: Keep in mind you need to enter the IP address for internal and external networks on the appropriate NIC, otherwise you will have connectivity problems when trying to reach your virtual appliance.
A good way to avoid confusions is to only enable the network card for internal. You can enable external after installing the appliance.
Next step is to enter your DNS IP address.

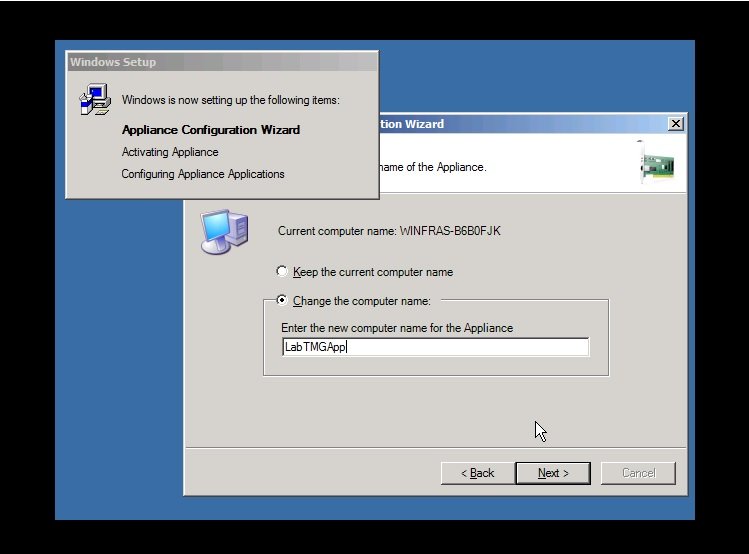
Choose a name for your computer. In our case, the name will be LabTMGApp:
Click Next to apply the configuration:

Once the configuration has been applied, click Next:

Now the initial phase is complete, click Restart:

After restarting press Ctrl + Alt + Del to logon:

After your first logon, the appliance will be activated and will start configuring the appliance applications:

Enter your Country, time and keyboard layout. Click Next:

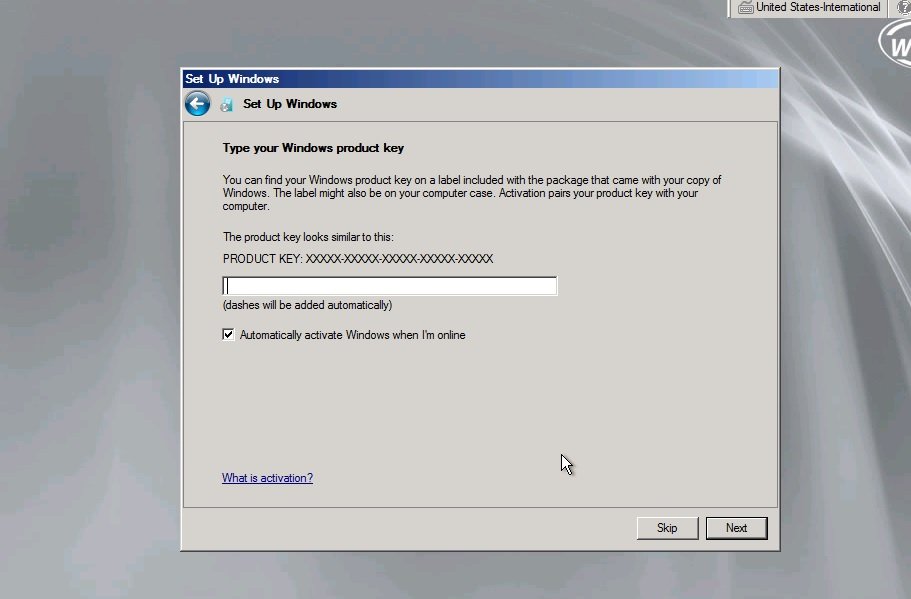
Enter your Windows Server 2008 R2 product key if you have one. If not, leave it blank and your appliance will function for 30 days before asking you to enter a product key again.
Select “accept” on both Microsoft and Winfrasoft license terms and click Start:

Winfrasoft Appliances include the ability to create self-signed X.509 SSL digital certificates. These certificates can be used for testing purposes or to allow for setup while production certificates are pending approval. Enter the DNS name of the required certificate and click Generate. After generating the certificate click Next:

Now you need to apply all settings. Click Next:

After all configurations are applied, click OK:

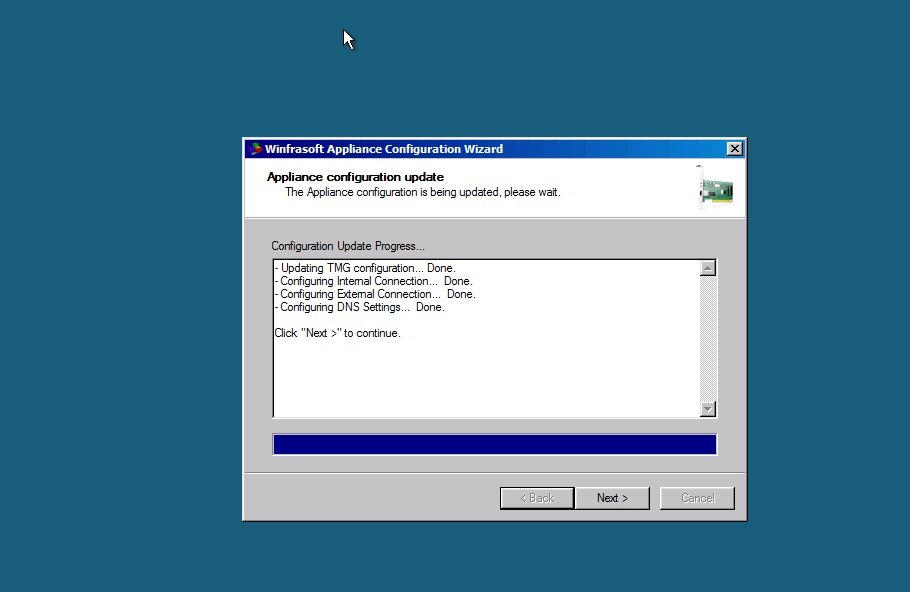
The Winfrasoft TMG Virtual Appliance will now update its settings. When complete, click Next to continue:
Click on Finish to restart your appliance:

After restarting you will see a normal Windows Server logon Screen. To access to your desktop you will need to enter the default Winfrasoft Appliance credentials. These are:
- User – administrator
- Password – Pa55w0rd
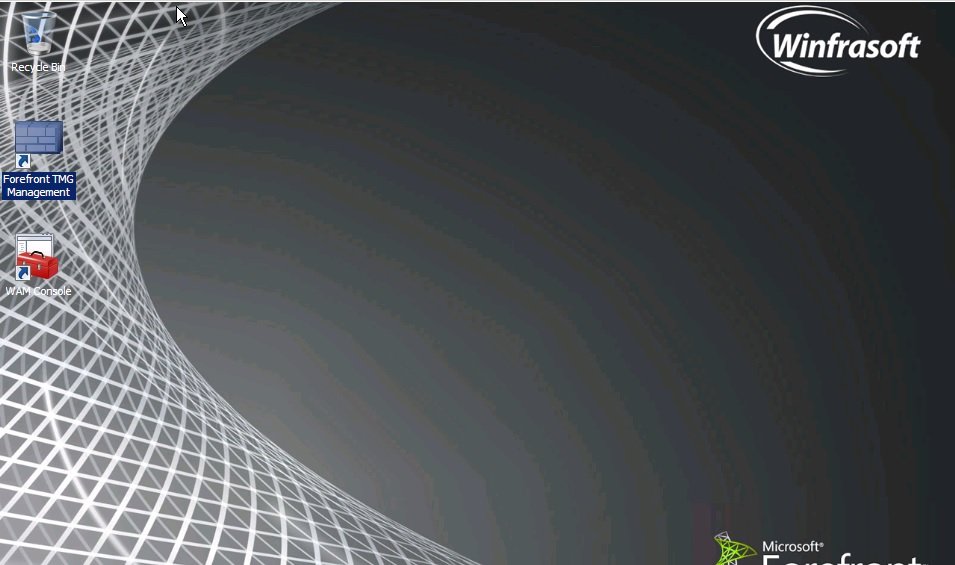
Once logged to the appliance, you will see the default Windows desktop screen:
Before joining your appliance to your domain, you need to configure Forefront TMG to give the appliance permissions to communicate with your network. Double-click Forefront TMG Management on the desktop, then click Configure Network Settings.

Click Next on the first page of the Network Setup Wizard:

Choose your Network Template and click Next. In this lab I’m using the Edge Firewall Template.

On the LAN Settings page make sure Internal is selected and click Next:

On the WAN Settings page, select External and click Next:
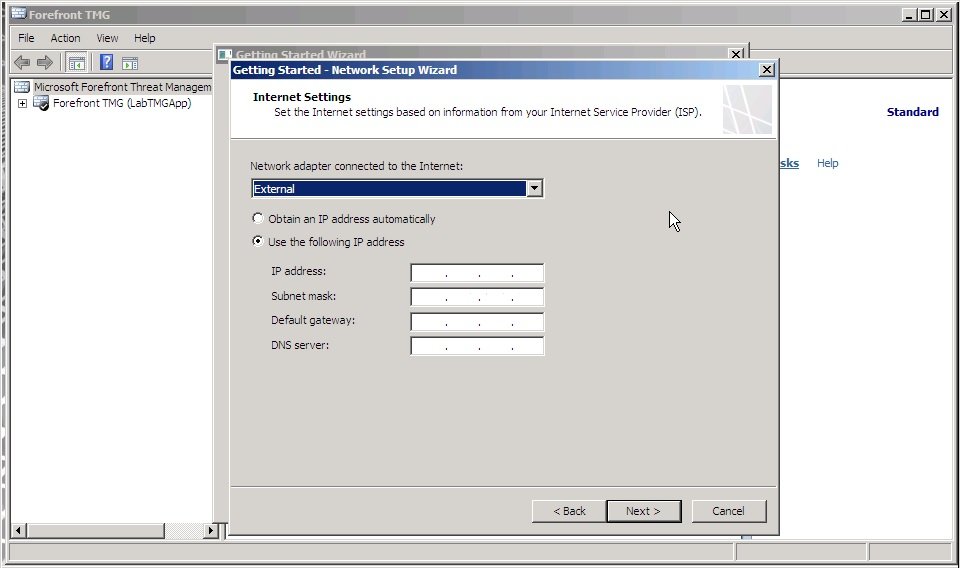
Click Finish to complete the Network Setup Wizard.

Your server is now configured.

At this time you can create rules making your appliance accessible to the rest of your network.
Go back to the Getting Started Wizard to join the server to the domain, configure update center and malware inspection.
You can also join the server to your domain using Server Manager as you would do for any other server.
Features of the Winfrasoft TMG Virtual Appliance
The Winfrasoft TMG Virtual Appliance can be fully managed from the Winfrasoft Appliance Management (WAM) Console. This snap-in can be found on the desktop:
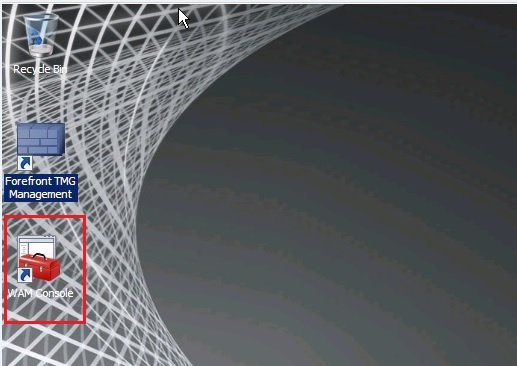
The WAM console presents all the shortcuts you need to administer your appliance:

Some of these shortcuts include:
- Winfrasoft Appliance Config Wizard – here you can change the settings on your appliance and also reinstall it from the ground up.
- Windows Update – here you can keep your server up to date using the windows update service or your WSUS infrastructure.
- Forefront TMG Best Practices Analyzer – A great tool to understand how your Forefront TMG is working and identify any potential problems.
- Microsoft Network Monitor – here you can monitor all network traffic passing through your Forefront TMG Server and understand how the server is dealing with it.
- Paragon Driver Backup and VPN-Q 2000 Server Manager
Fastvue TMG Reporter
For those wanting greater visibility into their network and web activity, there is no better tool than Fastvue TMG Reporter. Winfrasoft have now started shipping the Fastvue Arbiter with their appliances. The Arbiter is a small-footprint service that runs on your Forefront TMG Server that connect to the TMG logs (SQL Express, or W3C text) and passes the information over to the TMG Reporter server on port 49361.

Winfrasoft save you time by installing the Fastvue Arbiter by default. All you need to do is add an access rule to allow port 49361 from the Fastvue server to Localhost (TCP outbound), then just add your TMG Server as a source in TMG Reporter.
Thanks!
I’d like to give some special thanks to Winfrasoft support guys for your attention with my questions, to the Winfrasoft sales team for your great answers and interest in this post and last but not least, my friends from Fastvue Scott Glew and Jack Andrys for this opportunity to be part of this team of technical writers.
Take Fastvue Reporter for a test drive
Download our FREE 30-day trial, or schedule a demo and we'll show you how it works.
- Share this storyfacebooktwitterlinkedIn
How To Purchase Forefront TMG After January 2013
How to Enable and Disable SSL / TLS Versions on Forefront TMG